Have you ever tried to attach a folder to an Outlook email and found that there isn’t a direct option to select a folder? Usually, attaching a file or multiple files is simple, but not the folder. This guide has some tricks to follow.
Attaching a folder to an email can be a useful way to share multiple files simultaneously, but it requires a few extra steps compared to attaching individual files. In this article, I’ll walk you through the process step-by-step so you can easily attach a folder to your Outlook email.
How To Attach Folder In Outlook
To attach a folder in Outlook, one can simply compress the folder into a ZIP file and then attach it to an email. This can be done by right-clicking on the folder, selecting “Send to,” and then choosing “Compressed (zipped) folder.” After that, the ZIP file can be attached to an email in Outlook.

Method 1: Compress the Folder and Attach to Email
We can use any compressing tool, including the built-in tool from Windows OS (Windows 10 or 11), to compress the folder you want to send. After you create the compressed file, follow the below steps.
- Open Outlook and create a new email
- Locate the compressed file you want to attach.
If you haven’t compressed the file before this step, you need to do so separately from Windows Explorer.
To attach the entire folder, you’ll need to compress it into a zip file.
To do this, right-click on the folder and select “Send to” and then “Compressed (zipped) folder.” This will create a new zip file in the same location as your original folder.

- Attach the zip file to your email.
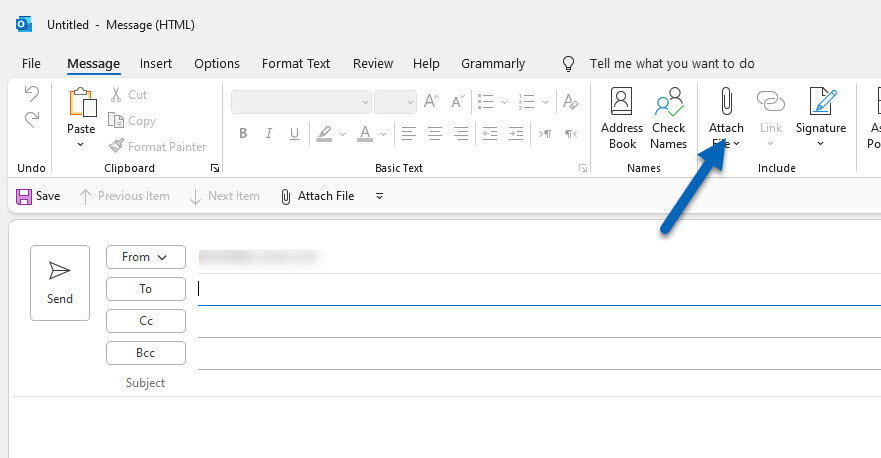
Now that you have your compressed folder return to your Outlook email and click the “Attach File” button.
Navigate to the location where you saved your zip file and select it. Once you’ve selected the file, click “Insert” to attach it to your email.
- Send your email
Finally, double-check your email to ensure everything looks correct, then click “Send” to send it to the attached folder.
These simple steps allow you to easily attach an entire folder to your Outlook email.
NOTE: If you use this method on a company email or Office 365 account, your administrator might block the zip file extensions as email attachments. Also, even the receiver’s email box can have a specific rule to block .zip, .rar, and other compressed file formats in Outlook attachments. You must consider this when sending and receiving compressed file formats in business emails.
To overcome the earlier restriction, you can follow the steps below to attach a folder to your Outlook email.
Method 2: Attach All Files Inside the Folder
If you want to know how to attach a folder in Outlook without compressing or zipping it, try this method.
This is not actually attaching a folder; this is to attach all the content inside the folder as files.
- Open Outlook and create a new email message.
- Click on the “Attach File” button in the ribbon at the top of the message.
- Browse to the folder you want to attach and select it. Click “Insert” or “Open” (depending on your version of Outlook).
- The folder will now appear as an attachment in your email. You can double-click on it to open and view the files inside the folder. Otherwise, please select all the files inside the folder and attach them.
- Add additional text to your email and hit “Send.”

This method may not work if the particular folder has subfolders. So, the ultimate solution is to zip/compress the folder with subfolders and files and attach it to an Outlook email.
What is the Best Way to Send a Folder in Outlook?
Suppose the folder is huge and contains multiple files and folders. If sending the compressed folder is not an option in your environment, then you need to share it via cloud storage.
In our organization, we use Microsoft OneDrive to share folders among users (internal and external). Another good option is to upload to a personal or company Sharpoint site and email the link.
For personal users, we can use personal OneDrive, Google Drive, or iCloud storage to attach and share folders in Outlook email.
How To Send A Folder In Outlook
To send a folder in Outlook, the user can compress the folder into a zip file first. Then, they can attach the zip file to an email and send it to the desired recipients. This method allows for sending multiple files within a single compressed folder easily in Outlook.
Attaching a folder to an Outlook email may seem daunting initially, but with these simple steps, you’ll be a pro in no time. Whether sharing important documents with colleagues or sending family photos to loved ones, this trick will save you time and effort. So go ahead, try it, and elevate your email game!