This guide is part of our Microsoft Outlook guides and teaches you how to create a PST file in Outlook. Creating a PST file in Outlook is smart for anyone looking to manage their email data effectively. Whether you’re archiving old messages or organizing your inbox, a PST file can be a lifesaver.
Understanding the Importance of PST Files
Effective email management is critical for personal and professional success in our digital age. PST files, or Personal Storage Tables, are a pivotal part of this management process within Microsoft Outlook. These files are essentially a personal archive—a repository for your emails, contacts, calendar events, and other Outlook items.
PST files serve multiple purposes:
- They act as a backup for important communications and information.
- They help keep your Outlook running smoothly by preventing mailbox overload.
- They provide a way to transfer data between Outlook accounts or even different computers.
By leveraging the power of PST files, we can take control of our email archives and turn a potentially overwhelming influx of information into an orderly, accessible resource. Our commitment to orderliness and data protection is reflected in the proper use of these files, and as we get ready to guide you through creating your own PST file, remember that a little effort now in setting up can lead to a more organized future with Outlook.
How to Create a PST File in Outlook
Step 1: Open the Outlook with correct account
Open the Outlook program on your Windows or Mac computer. It’s essential to ensure we’re logged in to the account for which we want to create the PST file.
Step 2: Access the Account Settings from File Menu
With Outlook successfully launched and our account ready, we’ll dive straight into accessing the File menu.
- Click the File tab in the top left corner of Outlook.
- Choose ‘Account Settings’ and from the dropdown, select ‘Account Settings…’ again.
- In the Account Settings window, click the ‘Data Files’ tab.
- Select ‘Add…’ to initiate the creation of a new PST file.
Adding a PST file to our account not only helps us organize our emails better but also helps us back up valuable data.
Step 3: Creating a New PST File
Once we’ve reached the Data Files tab and clicked the Add button. A window pops up prompting us to choose the type of file we want to create. Here, we’ll select Outlook Data File (.pst) and then click OK to proceed.
Give a meaningful name to the PST file and select the proper location.

It’s best to use a clear and descriptive name that reflects the nature of the emails or the purpose of the file, like ‘Work Emails’ or ‘Personal Backup’, which will make it much easier for us to identify later on.
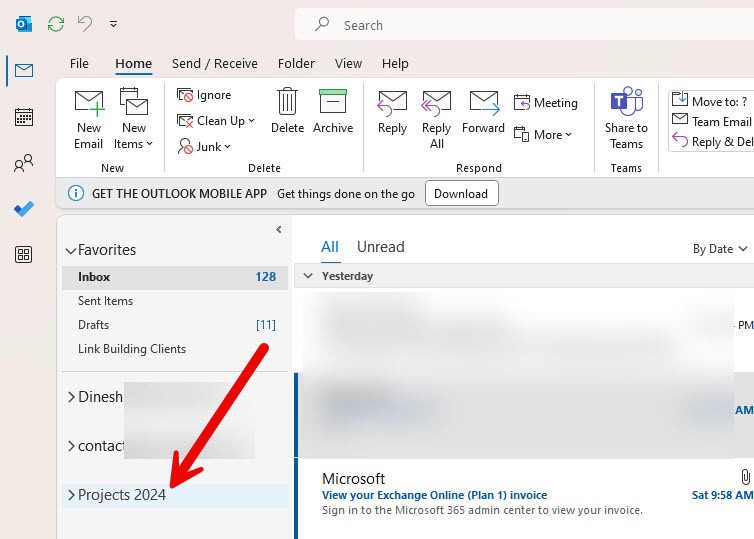
Now that our new PST file is created, it’ll appear in the Navigation Pane, usually at the bottom of our list of folders.
We can start moving emails into this new file immediately, which helps us keep the inbox uncluttered. Dragging and dropping emails or using the Move feature within Outlook will allow us to organize our inbox swiftly.
Best Practices for PST File Storage
Choosing the right location isn’t just a matter of preference. Research suggests that PST files should be stored on our local drives rather than network locations to avoid potential data corruption and performance issues. Here are some guidelines:
- Store the PST file on the same physical hard drive as our operating system to optimize performance.
- Avoid saving PST files to removable drives or network drives, as disconnections can cause corruption.
- Regularly backup our PST file by copying it to an external drive or cloud storage.
Step 4: Securing the PST File with a Password (Optional)
PST files are portable and can be attached to other computers and Outlook without any authentication or passwords. If you are storing sensitive emails to this PST file, it is highly recommended to setup the password for the PST file.
With the current Outlook versions, the option to set the password for a PST file doesn’t usually pop up (except if you create a PST file using the import/export menu). So, we need to set the password after creating the PST file.
Navigate to the same ‘Data Files’ settings, then select the PST file you need to set up the password.
Click on ‘Settings’, then ‘Change Password’ to configure a password.
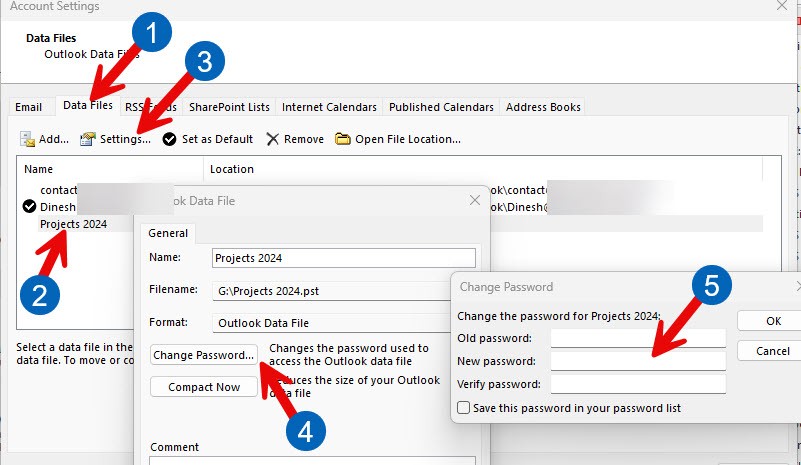
Write down the password and store it in a secure location. If we forget it, we cannot recover the encrypted information within the PST file.
Remember that once a password is assigned, Outlook will request it each time we access the PST file. Forgetting the password can lead to permanent data loss, so memorizing it or keeping it in a password manager is essential.
Step 5: Configuring PST File Settings (optional)
Configuring the settings to ensure optimal performance and organization is vital. First, let’s tackle Outlook’s AutoArchive feature. This functionality helps manage your mailbox size by automatically moving old items to your PST file regularly, keeping your primary mailbox lean and fast.
To configure AutoArchive, follow these simple steps:
- Access the AutoArchive Settings by going to the File tab, selecting Options, and then clicking Advanced.
- Here, you’ll find an AutoArchive section where you can adjust the frequency of archiving and specify the age of items to be archived.
By strategically setting the AutoArchive frequency, you maintain the balance between accessibility and performance. You can also decide on the retention period for different item types in your Outlook, such as emails, calendar entries, and tasks.
The next aspect of PST configuration is managing folders. Here’s how to ensure your folders are set up for easy navigation and retrieval:
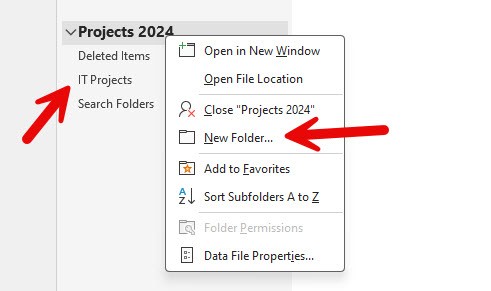
- Create folders and subfolders within your PST file to organize emails according to project, client, or any other category that makes sense for your workflow.
- To add a folder, simply right-click on your PST file in the Folder Pane, select New Folder, and name it appropriately.
Data File Properties is another setting that requires attention. This is where you can personalize your PST file with a friendly name, making it quickly identifiable among other data files. To rename your PST, right-click on the file, select Data File Properties, and enter your preferred name in the General tab.
Conclusion
We’ve walked through the essential steps on how to create a PST file in Outlook; these steps are applicable for Windows or macOS Operating Systems. Based on the Outlook version you have, the screenshots may vary.
Even though setting up a password, using AutoArchive, and organizing folders are optional, we highly recommend to perform if you really want proper security and maintenance. If you have any queries, feel free to mention them in the comments section.