It is a bit tricky to reply to an email with an attachment in the Outlook program (Windows or macOS) or app on your smartphone. This guide will check various options and methods on how to reply with attachments in Outlook.
When it comes to replying with attachments in Outlook, there are a few things to remember:
- Understand why you’re sending them. Attachments can add info and help your communication.
- To reply with Outlook attachments, click “Reply” at the top of the screen. Look for the paperclip icon.
- Select the files you want to attach. Note that Outlook has size limitations. Compress them if they’re too large.
- Be sure to include relevant attachments. They can help take your emails to the next level.
- Don’t forget the power of attachments. Try it out and see the difference it makes!
Latest Outlook Updates: Replying with Attachments Made Even Easier
Outlook continues to improve how you manage attachments when replying to emails. Here are some recent enhancements and tips to help you get the most out of your email workflow:
Understanding Email Attachments in Outlook
Let’s clarify a few things before we proceed with the detailed steps. How do I reply to an email with an attachment? The simple answer is it is not straightforward. Outlook doesn’t offer this feature for some reason.
- You can only reply to an existing email with an attachment with workarounds.
- You can forward an existing email with an attachment to the same or other recipients, but you’ll need to add the email recipient’s email addresses again.
- Reply to the email first, then manually copy (or attach files/attachments you want to include).
- Use a few Outlook add-ins to reply to emails with attachments.
Add Attachments While Offline in Outlook for Windows
The new Outlook app for Windows now lets you add attachments to your replies and forwards even when you’re offline. Simply attach your files as you normally would—Outlook will automatically send your email with the attachments once you’re back online. This is especially handy if you’re working on the go or don’t always have a reliable internet connection.
Tip: If you’re switching between the classic and new Outlook experience, look for the “Switch to New Outlook” toggle in the top right corner of the app.
Let’s say I want to reply to the email below with the attachment…
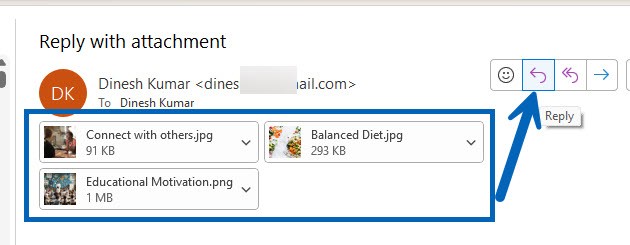
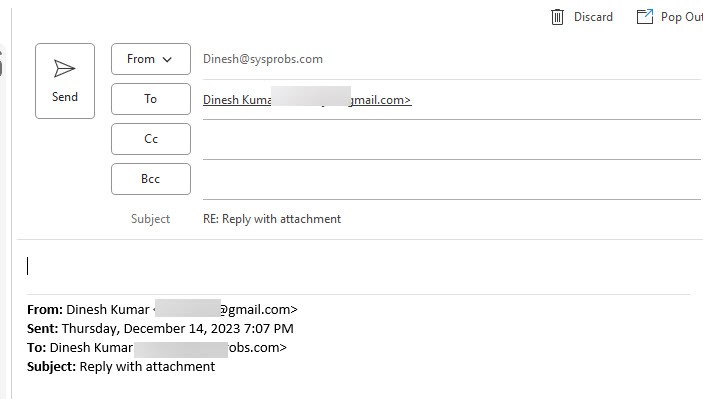
As expected, you get the below prompt without the attachments.
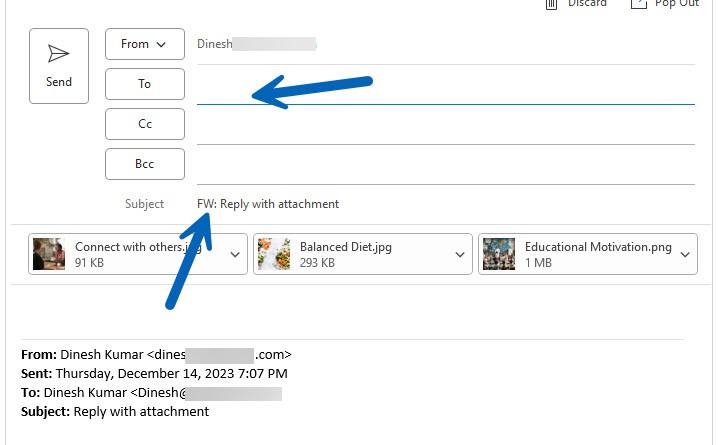
Method 1: Forward and Add Email Addresses
You can forward the particular email that has a single or many attachments. So you will not lose track of the email or attachments. However, forwarding will remove all email addresses in the to or CC. In this case, you need to manually copy and paste the correct emails to the correct To or CC/BCC fields.
Things to consider in this method:
- You may need to consider changing the ‘FW’ to ‘RE’, so the recipients will see it as a reply email.
- You need to add the correct email addresses in the correct field, like the original email. This could be tricky if the email contains many addresses.
Method 2: How to Reply with Attachments in Outlook
This is another method that is opposite to the earlier method. Here, we select the reply option, so it will keep all email addresses but remove the attachment. Then, you need to attach the attachments manually.
- Open the email: Open the email you want to reply to.
- Click the “Reply” button: Click the “Reply” button to start drafting your reply.
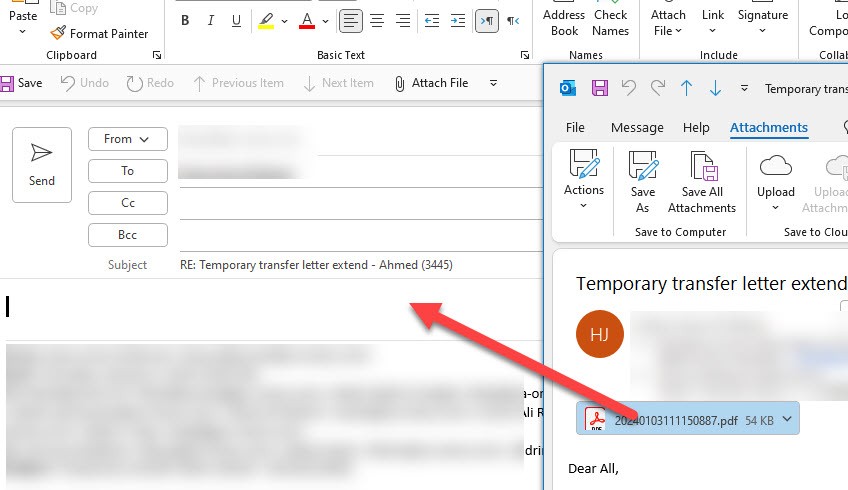
- Attach files: Click the paperclip icon to attach files from your computer.
- Select and Open: Select the files you want to attach and hit “Open”.
- Also, you can open the previous email with the attachment and drag and drop the files to the email you are composing/replying to.
This lets you reply to messages and include any necessary attachments. It’s a convenient way to share files and info with your recipients. Plus, Outlook supports many file formats for attachments, like documents, images, videos, and more. So it’s easy to share different types of content.
Improved Mobile Experience: Copy and Paste Attachments
On Outlook’s mobile apps for iOS and Android, you can now copy attachments from one email and paste them directly into your reply. There’s no need to download files to your device first. Just long-press the attachment, select “Copy,” and paste it into your draft reply. This makes handling attachments on your phone or tablet much quicker and more convenient.
Method 3: Attach the Entire email as an Attachment While Replying.
One more Outlook setting you must be aware of. Once you enable this option, Outlook will reply the entire email (including the attachment) as a complete attachment. The receiver can’t read the mail trail like other normal replies. They need to open the attachment to check the trail/history with the original attachment.
By default, this option is disabled; once you change it, the behavior will be applied to all emails you reply from Outlook.
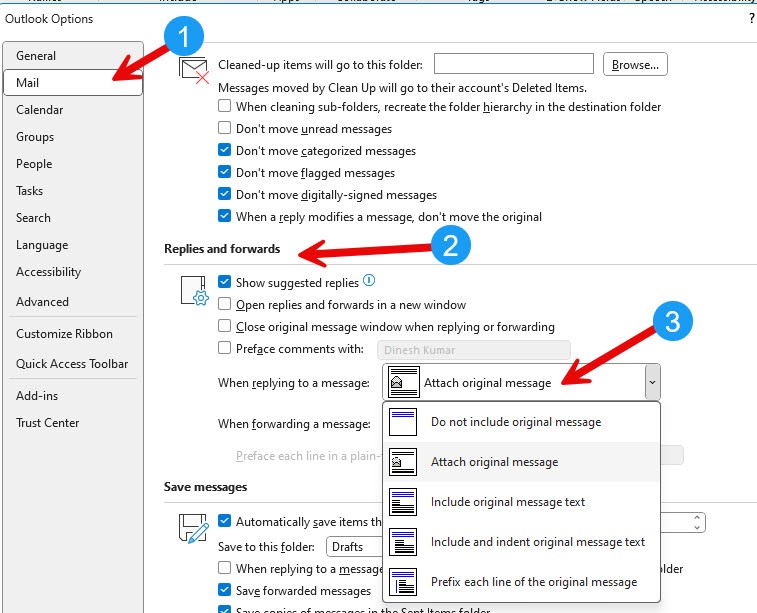
Go to Outlook options by clicking the ‘File’ menu, then select ‘Mail,’ scroll down to last, and locate the ‘When replying to a message’ under ‘Replies and forwards.’
The default setting is ‘Include original message text’ when replying to an email, but you can change it to the ‘Attach original message’ option, as shown below.
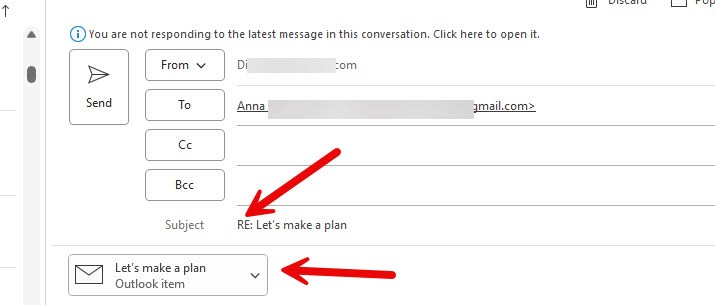
So, from now onwards, when you reply to any email, it is going to send the previous mail trail (including the files) as an attachment. Here is an example.
Method 4: Use Outlook Add-In to Reply with Attachment in Outlook
You can use an add-in specifically built for this purpose.
- Download and install the add-in from the official website or Microsoft store.
- Once activated, you will see the additional option while replying.
- Select Reply or Reply All with an attachment option while replying to an email. More information is available in the video below.
One-Click Add-Ins for Replying with Attachments
If you often need to reply with attachments, consider using one of the dedicated add-ins available from Microsoft AppSource. These add-ins add a convenient “Reply with Attachments” button to your Outlook toolbar, making the process faster and more efficient. They’re compatible with both the classic and new Outlook interfaces.
| Feature/Update | Classic Outlook | New Outlook for Windows | Outlook Web | Mobile Apps (iOS/Android) |
|---|---|---|---|---|
| Reply with Attachments Button | Add-in needed | Add-in needed | Add-in needed | Not native, but improved copy-paste |
| Offline Attachment Support | Yes | Yes (improved) | Yes | N/A |
| Copy-Paste Attachments | Manual | Manual | Manual | Native support |
| File Type Restrictions | Increasing | Increasing | Increasing | Increasing |
| Launch Classic Outlook Directly | Yes | Yes (from June 2025) | N/A | N/A |
Tips for Handling Attachments in Outlook
Handling attachments in Outlook is a breeze with the right tips. Here are a few expert recommendations to help you get the most from your Outlook experience:
- Be conscious of file size. Large attachments slow down delivery and take up storage space. Check the size before sending.
- Compress attachments into ZIP folders to save space and make it easier for recipients to access.
- Scan for viruses before opening attachments. Use Outlook’s built-in protection to stay safe.
- Organize attachments with folders. This keeps your inbox neat and makes them easy to find.
- Choose wisely when replying to emails with attachments. Include or exclude attachments based on context.
Also, not all file types can be previewed directly in Outlook. They may require external apps or software for full accessibility.
Now that you know these tips, go ahead and make the most of Outlook’s attachment handling! Don’t miss out – give them a try today!